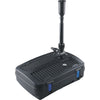
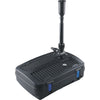
Relevant voor producten:
Step 1 - Remove the lid and unscrew the UV-c unit
Remove the lid from your BluFilter by opening the blue clips. Unscrew your UV-c unit using a Phillips head screwdriver. The UV-c unit is mounted with 2 screws.
Step 2: Disconnect the UV-c unit
Disconnect the UV-c unit from the pump by loosening the thread. Release the safety clip and unscrew the plastic part of the UV-c unit so that the UV lamp becomes visible.
Step 3 - Remove the lamp from the UV-c device
Use a clean, dry cloth to grab the UV lamp. This prevents grease stains on the lamp. Carefully pull the lamp out of the holder. Remove the protective cap from the UV lamp.
Step 4 - Replace the lamp with the protective cap
Use a cloth to protect the lamp from grease stains and breakage. Replace the protective cap on the lamp. Place the lamp back into the UV-c holder. Press the lamp firmly.
Step 5 - Replace the UV-c Unit
Place the plastic UV-c unit back on the lamp and holder. Turn so that the ends line up correctly with the pump again. Screw the pump back onto the UV-c unit.
Step 6 - Screw the UV-c unit in place and replace the lid
Mount the UV-c unit with screws. Place the plastic seal near the cord. Reattach the lid and secure with the blue clips.
Check lamp operation
You have replaced the lamp and it will help you again to fight algae and keep your pond clear! Check the operation of your UV-c lamp by turning on the BluFilter in the pond. The inspection glass will light up blue. Note that this is sometimes difficult to see in daylight, check again in the dark.


